earning how to smoke dabs may seem daunting at first, but it’ll comes easily once you read about it. To help ensure your first time goes smoothly, this resource will teach you how to take a dab.
Essentially, dabbing is the flash vaporization of cannabis concentrates, once they are applied to a hot surface and inhaled. These concentrates (you’ve maybe heard of shatter, wax, BHO, oil, etc.) are a lot more potent than flower, so a little bit goes a long way.
While bud tends to test between 15-25% THC, concentrates typically range between 50-80% THC, depending on the extract type and quality. You can even dab non-intoxicating CBD extracts for quick therapeutic effects with little to no cerebral euphoria, but in some regions these oils can be difficult to find.
Dabbing isn’t for everyone, especially if you’re new to cannabis entirely. The dosing process is more delicate, but once you’ve gotten the hang of it, concentrates can offer you new heights of physical relief and unique cerebral effects. Extracts also contain a lot less plant material than flower, so you’re inhaling more cannabinoids (e.g. THC, CBD) and less combusted resin. Check out our tips for dabbing.
What dab tools are needed?
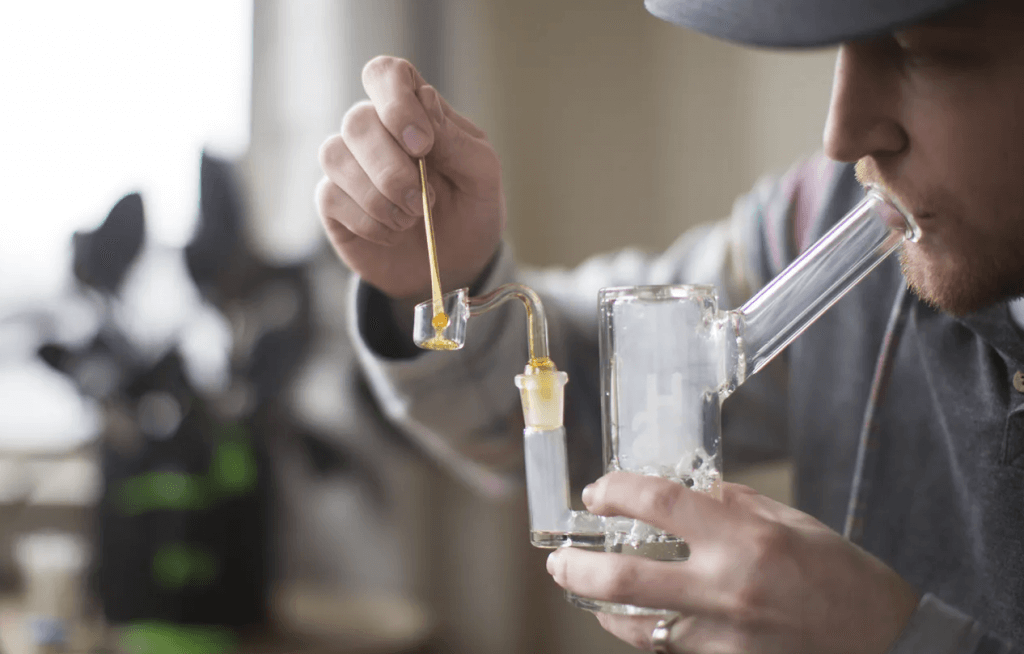
When learning how to use a dab rig, keep in mind that dabbing technology is evolving. The traditional setup includes the following items:
- Dab rig. This water pipe is like a bong except it will have a fitting for a nail.
- Nail. This is like the bowl for your bong and where you will put the concentrate. The standard today is a quartz banger, which has a bucket shape. Ceramic and titanium are other options, and e-nails are becoming more common. Be sure to get the correct joint size, where the nail slides into the dab rig: If your rig has a 14mm stem, you need a 14mm nail. Nails can be male and female as well—you need a male nail for a female rig, and vice versa.
- Dabber. Use this tool to apply the concentrate to the nail. They can be metal, glass, or ceramic, and have many shapes: ballpoint, needlepoint, scoop, spoon, paddle, etc. Pick a shape depending on the texture and consistency of the concentrate you’re dabbing.
- Carb cap. Although not necessary, we highly recommend one of these to help regulate airflow. Combination dabber/carb caps are increasingly popular.
- Torch. Mini-torches used for crème brulee are commonly used, but you’ll have to stock up on propane for them. Again, e-nails are increasingly common (but expensive) and cut out the need for a torch.
- Cannabis extract. These come in a variety of forms, but the most common ones used for dabbing are shatter, wax, BHO, and solventless extracts like rosin.
- (Optional): Dab mat. To keep your dabbing surface clean and not sticky.
- (Optional): Timer. To ensure you heat your nail up consistently dab after dab.
How to dose cannabis oils and concentrates

Measuring a dab can be daunting as well. Different extracts have different THC concentrations, so it’s helpful to know how potent your concentrate is before dabbing it. It’s generally recommended to start small and increase the dose if you feel comfortable doing so.
A small dose is no bigger than a crumb. It may not look like much, but that’s a lot of THC going straight to the dome at once. Dabbing can feel a lot more intense to those accustomed to flower, but as your tolerance adjusts, the effects become less jarring.
Portioning
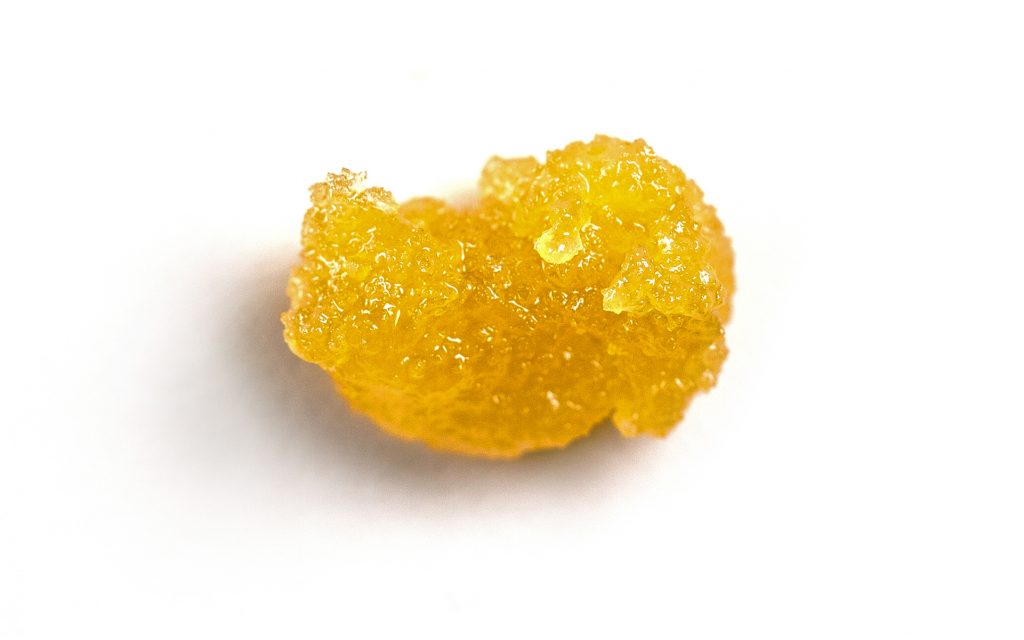
Legal markets are required to add cannabinoid information on their concentrate packaging. Potency is broken down into a percentage. Most solvent-based hash oils will land in the range of 60-90% total cannabinoids, with a few special examples exceeding 90%. The potency of some solventless concentrates may fall below 50% total cannabinoids.
For example, if you have one gram of hash that contains 80% total THC, that one gram will contain 800mg of total cannabinoids. For reference, the recommended starting dosage for an edible is between 5-10mg. This should be an indicator that dabbing is generally for more experience cannabis consumers. Obtaining a 5mg dab from a piece of hash is difficult.
If you split that gram of hash into eight equal portions, each portion will have 100mg of cannabinoids. It’s easier for the naked eye to split the concentrate into eight pieces than pulling a 25mg dab off of an 800mg slab. For reference, a 25mg dab at the ratio of 80% total THC typically comes in about the size of a couple grains of couscous. This will change depending on the potency of your sample, which is why reading the label is important.
Always start small
Don’t be afraid to take the smallest dab that your tool will allow and use that as a reference point. Micro-dabbing offers many benefits, and you can always take another dab. Find a dab size that works for you.
It’s important to understand that different sizes of dabs—and different ratios of cannabinoids—will affect everyone uniquely. A 25mg dab of THC is not guaranteed to give you the same psychoactive effects as your friend; our endocannabinoid systems all operate differently. The best way to find out what dose works for you is to start small and work your way up.
How do you dab?
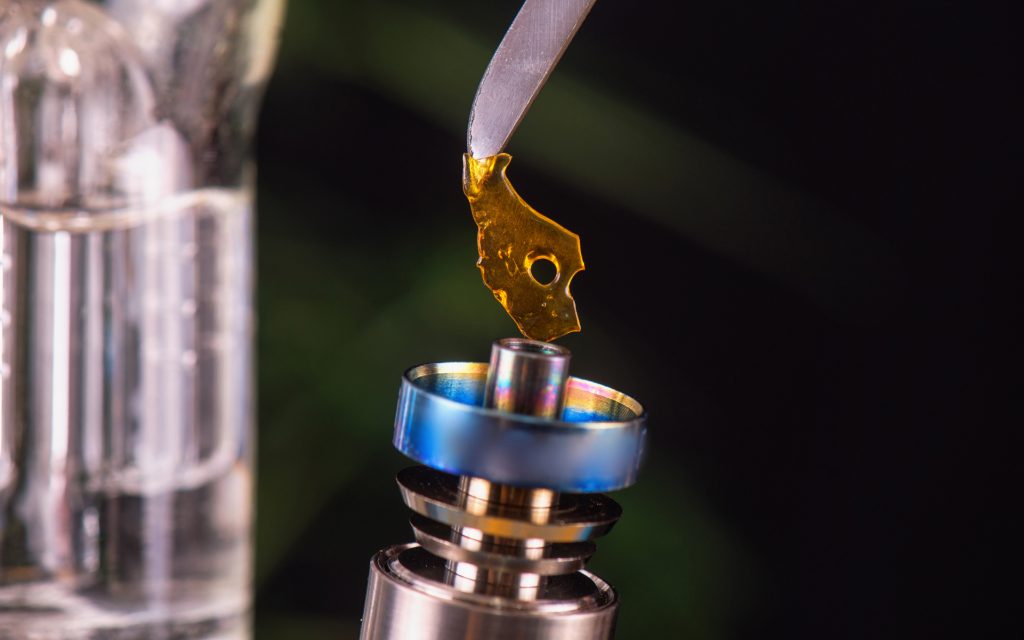
Once the rig is set up and your dab is prepared on the dabber, you’re ready to get started. We advise sitting down while taking a dab, since it might be intense.
- Step 1: Turn on your torch and aim the flame directly at the nail. Most people will heat the nail until it begins turning red hot. If you’re using an electronic nail, refer to the section below for more information on heating.
- Step 2: Once the nail is hot, turn off your torch. It’s recommended to let quartz nails cool for about 45 seconds (and about 10 seconds for titanium) so the surface temperature isn’t too hot—this is where a timer can come in handy. Check out this article for more tips on how to get the right temperature.
- Step 3: Apply the dab directly onto the nail with your dabber and begin inhaling slowly. Rotating the dabber tip on the nail can help prevent wasting any oil stuck to the dabber.
- Step 4: Cover the dab with a carb cap and finish inhaling—a cap will help regulate the airflow. Always cap your dabs.
- Step 5: Exhale and enjoy!
Safety note: Nails become extremely hot when dabbing. Take caution when handling them, and always wait for all pieces to cool down before you even think of touching them.
How to clean your nail
After a dab, carbon, reclaimed oil, and particulates can build up in the nail. A lot of people will clean their nail after each hit, but you should at least do it at the end of each session. Here are some ways to clean your nail:
- Torch. The easiest way to clean your dab nail is to heat it with your torch to burn off any residual carbon or reclaim on your nail. When applying this method to ceramic and quartz nails, be careful not to expose your red hot nail to a rapid change in temperature or you may risk a stress fracture. After your nail becomes red hot and the residue dissipates, let it cool down completely before finishing off with a final scrape.
- Scrape. For minor buildup, use a sharp dabber tool to lightly scrape your nail. Be careful not to chip any glass.
- Wash. Try soaking your nail in 91% isopropyl alcohol for 10 minutes.
What are e-nails?

The above explains how you take a dab using the common torch-and-nail method, but e-nails are becoming increasing popular.
E-nails, or electronic nails, are significantly more expensive than standard nails, but the investment is often worth it for serious dabbers. They cut out the need for a nail and a torch, which is easily the most dangerous element of dabbing. Furthermore, you will have full control over your nail’s temperature. This is a fantastic feature if you care about making the most out of flavors and terpenes when you dab.
Dabbing technology is constantly improving and expanding, so watch out for the latest trends and products if you’re interested in leveling up your dabbing game!
Patrick Bennett also contributed to this article.



You must be logged in to post a comment.