So you wanna know how to make dabs, huh? You’ve come to the right place! We here at Bud Cargo have been doing this so long (and so well, we might add), we’ve forgotten more about cannabis production (in all its forms) than most people will learn in a lifetime.
That makes us uniquely qualified to tell you everything you need to know about making dabs…even if we do say so ourselves. So that’s what we’re going to do.
But jumping right to the “how to” is a bit like going on Dancing With The Stars without any training: the end result isn’t going to be pretty. So before we tell you how to make dabs, we’re going to give you a bit of background on the subject (dabs, not Dancing With The Stars).
Along the way, we’ll answer such questions as:
- What is dabbing?
- What exactly are dabs?
- What is wax?
- What equipment will you need to dab?
- Why choose wax over other concentrates?
After that, we’ll explain how dabs are usually made and then give you a DIY recipe for how to make dabs at home (safely, and without exploding). Sound good? Let’s get started.
What Is Dabbing?

Dabbing is the process of heating a special form of cannabis and then inhaling the vapor. Dabbing gets its name from the tiny dabs of wax that are used with a special rig (a dab rig) to get high (THC dabs) or get your medicine (CBD dabs).
Let’s take a moment to clarify those two sentences by talking about dabs, wax, and equipment specifically.
What Are Dabs?
Think of dabs as “bite-sized,” single-serving hits that are usually no bigger than your pinky nail (though that’s actually a lot!). You scoop a dab onto the nail using a dabbing tool and then apply a flame to turn the solid into vapor. Finally, you inhale as much of the vapor as possible. That’s dabbing in a nutshell.
What Is Wax?
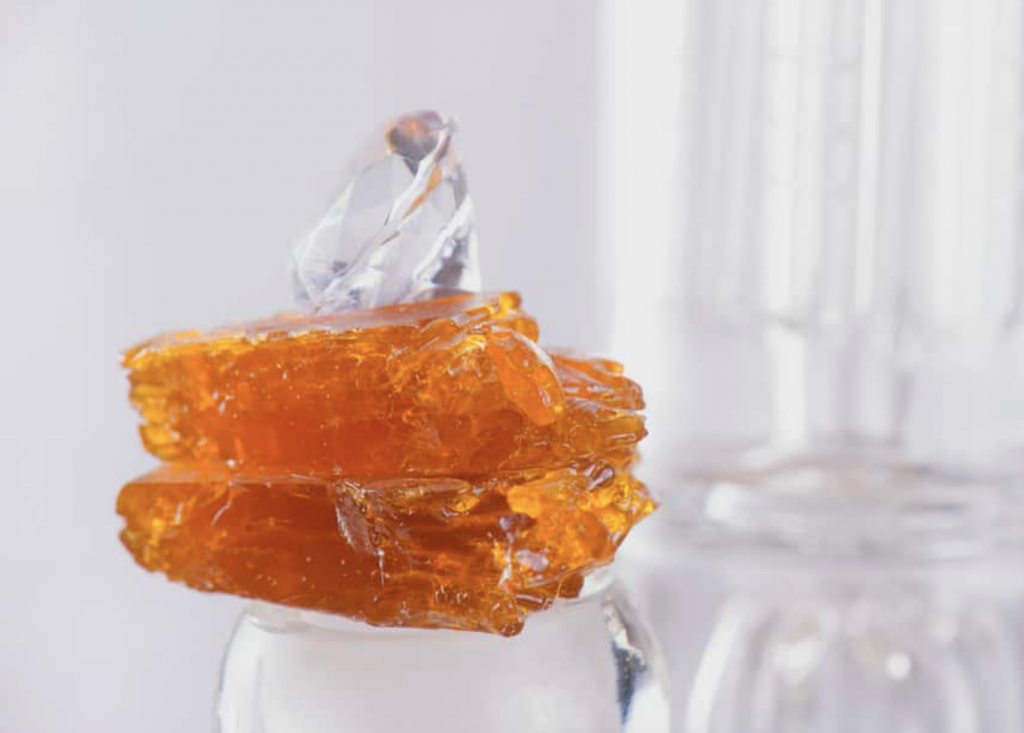
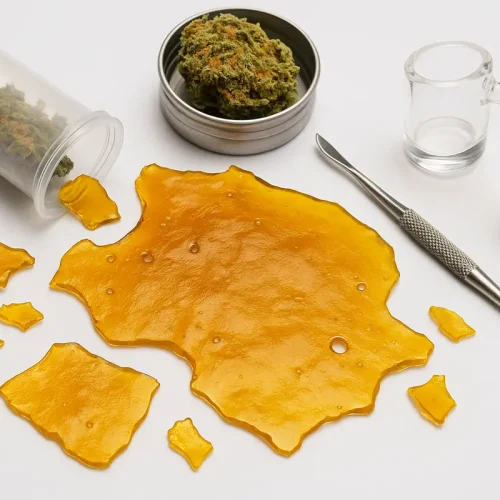
Wax is a type of dab (the other being shatter). And if you’re wondering why wax is called wax, the answer is really very simple: the stuff looks like earwax. Sounds gross, we know, but you’ll get over it after you’ve tried your first hit.
What Equipment Will You Need To Dab?

Dabbing requires some specialized equipment, so you can’t just decide one morning that you’re going to try it without first going shopping. Here’s what you’ll need:
- Dab rig — A specialized bong used with dabs.
- Nail — This isn’t the type of nail you buy at the hardware store.
- Dome — Fits over the nail and helps contain the vaporized wax.
- Carb cap — Creates a mini oven that helps vaporize the wax at lower temperatures.
And then, of course, you need your dabs.
So What’s The Big Deal?
Dabbing is a big deal because the wax or shatter that you use is a concentrated form of the buds you buy at your local dispensary. And by concentrated, we mean really high in THC or CBD. How high exactly? Anywhere from two to four times over regular bud.
Depending on the strain used to start, wax can clock in at 50-90% THC (or CBD). Even the strongest strain only hits around 25%. So you can see why dabbing is such a big deal: You can get seriously high with just one or two hits.
Why Choose Wax Over Other Concentrates?
We’ve mentioned that there are several types of concentrates you can use when dabbing. We like wax over shatter for several reasons:
- Wax is easier to produce.
- Wax is easier to handle.
- Wax is easier to measure.
- Wax is easier to use.
We’re not saying we wouldn’t dab with shatter. We’re just saying that if we had the choice, we’d go with wax first because of the reasons mentioned above.
So now that you know everything there is to know about dabbing, dabs, and wax, let’s talk a bit about how wax is made. Then we’ll show you a simple recipe for how to make dabs in your own kitchen.
How Is Wax Usually Made?

If you were a weed wax pro, you’d make your product through butane extraction. “What is butane extraction?” you ask. Here’s the skinny.
Butane extraction involves forcing butane (duh!) through a container full of marijuana bud. The butane acts as a solvent and separates the essential oils (made up of cannabinoids, terpenes, trichomes, and flavonoids) from the cannabis plant.
Those oils held in solution along with the butane are called butane hash oil (or BHO for short). But you wouldn’t want to dab with this stuff because butane is toxic. That’s why the next step is so important.
Once you’ve soaked your plants in butane and dissolved all the canna-goodness, you allow the butane to evaporate out of the solution. That leaves behind a highly-concentrated oil that, when it dries, hardens into either shatter or wax.
Sounds simple enough, right? It’s not. Butane is highly flammable and can explode (yes, explode!) with the smallest spark. That’s why we don’t recommend using butane extraction at home to make your own wax.
There are much safer ways to produce some dab goo than to risk life, limb, and residence trying to emulate the pros and their fancy equipment. Don’t do it! Instead, try this non-toxic, non-explosive method for making your own wax.
How To Make Dabs At Home
Below, we’ll give you several options and step-by-step guides on how to make dabs on your own…without the risk of death or loss of property.
Alcohol Extraction
Those in the know (like you are now) call this the QWISO process. QWISO stands for “Quick Wash Of Isopropyl Alcohol.” So, as you can probably guess, we’re going to use alcohol to make this work. But we’re not going to use just any alcohol. We’re going to 99-100% pure alcohol.
That’s a lot different than the vodka you may have stashed in your cupboard. It’s even different than the Everclear you’ve seen at the liquor store. Isopropyl alcohol is not meant for human consumption, so don’t, by any means, put it in your mouth.
It’s also important to understand that 99-100% alcohol is flammable. It’s nowhere near as bad as butane, but you don’t want to handle it around an open flame. Needless to say, it’s not a good idea to try this recipe if all you have is a gas stove.
Okay, so enough with the warnings. Here’s what you’ll need to make dabs at home.
Ingredients
- 2.5 grams of your favorite ganja
- Containers that pour well and are freezer- and heat-safe
- 99-100% isopropyl alcohol
- Metal mesh screen
- Unbleached coffee filters
- Pan
- Hot water
Directions
1) Break up your bud just a bit (not too small).
2) Put it in an oven-safe container and dry the cannabis at 200 degrees Fahrenheit for 20 minutes. Please note, this is not decarboxylation.
3) Once the cannabis is sufficiently dry, put it and the bottle of alcohol in the freezer for three to five hours.
4) Wait (we know this is the hardest part).
5) Pour enough cold alcohol over the cannabis to cover it by at least one inch.
6) Gently swish the mix for 20 seconds.
7) Separate the bud from the alcohol by pouring through a mesh screen.
8) Set the plant matter aside for now (from here on out, we’re going to focus on the alcohol).
9) Pour the alcohol through an unbleached coffee filter into another container.
10) Squeeze the coffee filter to get as much of the alcohol out as possible.
11) Allow the alcohol to evaporate. You can do this in one of three ways:
- Place a coffee filter over the top of the container and just give it time.
- You can also use a warm water bath to speed the process.
- If you’re really impatient (like we are), you can put the water bath on the stove at low to medium heat until you see liquid start to evaporate. Be sure not to boil the alcohol.
12) When all the alcohol is gone, scrape the wax out of the container and store in a glass container or on some parchment paper.
13) Enjoy your dabs! (See, 13 isn’t always an unlucky number.)

You can also run the original buds through a second wash (this time for one minute), to get every single drop of the remaining good stuff. Then proceed from step seven as outlined above. That’s all there is to it!
Ice Water Extraction
Ice water extraction is similar to alcohol extraction, but it uses an even less-combustible solvent: ice and ice water.
Ice water extraction is ideal for those who don’t want to worry about explosions or fires but still want to learn how to make dabs and experience the rush of a cannabis concentrate.
The dabs you make with ice water extraction are also called bubble hash because of the sieve-like screens (bubble bags) you use to separate the trichomes from the plant matter.
Learning how to make dabs in this way is easy to do but requires a bit more time, patience, and elbow grease than other extraction methods. Keep at it and you’ll soon be dabbing your way into recreational or medicinal bliss.
Tips To Make Ice Water Extraction Easier

1) Keep Your Cannabis Chilled
Obviously, the ice you’re going to use is really cold (frozen even). But to make the process work a lot better, we recommend getting the water — and even the air around you — as cold as possible.
The finished product will be so much better. You can thank us later.
2) Preserve The Purity
No, we’re not talking about THAT purity. We’re talking about the water you use during ice water extraction.
The stuff that comes out of the tap in your kitchen is full of chlorine and fluoride (among other things). Even if you have well water — a “privilege” that only country folk will appreciate — you’re still getting extra chemicals (like iron and sulfur) that don’t mix well with the trichomes you’re trying to extract.
We recommend always using purified water — which you can buy at your local market — to preserve the purity of your dabs.
3) Quality In Equals Quality Out
Sure, you can use regs like shake and trim to make your dabs, but that’s going to result in a product that might not produce the effects you’re looking for.
Imagine dabbing without the THC high or the CBD pain relief. What would be the point of that?
Instead, always use the best quality bud you can get your hands on. We recommend beasters or headies — the strain doesn’t matter — so that the dabs don’t leave you disappointed.
4) Find A Comfy Spot To Perch
As you’ll see in the directions below, you’re going to be stirring or agitating in your 5-gallon bucket for a hefty stretch of time.
There are few things worse than crouching in your kitchen staring at your sauce-splashed cabinet doors for upwards of a half-hour.
Instead, throw down a tarp in front of your TV, cue up a movie, and Netflix and chill while making dabs so you aren’t bored out of your gourd.
Ingredients And Supplies
- Your favorite high-quality high-CBD or high-THC strain
- 10-15 pounds of ice
- 5-gallon buckets (at least one for mixing and one for wet screens)
- Purified water
- Cheesecloth
- Stir sticks
- Bubble bags (check online for this item)
Directions
- Layer your bubble bag or screen (three or four of them) in the bucket from smallest to largest. The smaller the number, the smaller the screen.
- Add 3-4 ounces of high-quality cannabis.
- Pour half a bag of ice on top of the cannabis.
- Add enough purified water (about eight cups) to cover the cannabis under the ice.
- Mix the ice, water, and buds together.
- Continue to agitate the mixture for 15 or 20 minutes.
- Let the mix settle for another 20 or 30 minutes.
- Lift the first bubble bag part-way out and let it drain back into the bucket. You can even shake and squeeze the bag to get all the water out.
- Set that bag aside.
- Remove the next bubble bag and scrape out the material at the bottom of the screen (a spoon works great here). Deposit the dab material onto your cheesecloth. This is the least pure form of bubble hash (but it’s still good).
- Remove the next bubble bag and let it drain into the bucket. Don’t squeeze this bag to remove the water. Just let it drain.
- Scrape out the goo at the bottom of the bag and deposit it onto your cheesecloth. There should be more material in this bag compared to the first one. And it will be lighter in color and contain less plant matter.
- Continue removing bubble bags from the bucket and scraping out the dab material until you’ve reached the last one.
- Fold the cheesecloth on top of the goo and press gently to remove the leftover water.
- You’re left with three or four different grades of dab material depending on how many screens you used. Keep in mind that you can mix all the concentrate together. You don’t have to keep it separate. We just wanted to highlight the different qualities so you understand what you’re getting.
- Repeat this process one or two more times to get as many of the trichomes off the bud as possible.
That’s it! You’ve learned how to make dabs. Congratulations!
So now that you’ve made your own DIY dabs, you might be wondering what to do with them? We’ve got your back, Jack.
How To Use Dabs
1) Dab Rig
The most common way to use dabs is in — wait for it — a dab rig! Whether you’ve got wax, shatter, budder, or some other form of concentrate, you can smoke it in a special bong designed specifically for extracts.
2) Blunt, Joint, Spliff
If your dabs are more hash-like than wax-like (it’s ok, don’t develop wax envy, it’s all just concentrated cannabis anyway), you can crumble a bit into your blunt, joint, or spliff before you close.
Paired with a tried-and-true strain like Blue Dream, Chemdawg, Sour Diesel, or Fruity Pebbles, the high THC or CBD content in your dabs will add an extra kick to an already enjoyable experience.
You can also use dab crumbles to hit the Turbo Boost button on your joint-, blunt-, or spliff-smoking experience when rolling with low-quality bud.
The mids you found stuffed in the back of your drawer from who-knows-when take on new life — and new potency — when you mix it with your DIY dabs.
3) Edibles
When we DIY a batch of dabs that is more hash than wax or shatter, we love to mix it in our favorite edibles recipes.
We’ve added it to everything from butter and honey to tea and candy. We’ve even sprinkled it on top of our lunch salad to get our afternoon started off right.
Just remember that dabs are concentrated cannabis, have a high THC or CBD count, and can really knock you on your back if you’re not careful.
There really are few things worse than being couch locked at work or trying to write a report while your desk and computer dance the Lambada in front of you.
Start Small And Take It Slow

As with any new marijuana endeavor, it’s always a good idea to start small and take it slow. If you’re dabbing for the first time, try one hit and wait a few minutes to see how your body reacts. You can always hit the rig again if you need more, but you can’t return those hits if you take one too many.
The same goes for making your own wax to dab. Start with a small batch, get the hang of the process, and then increase your production when you’ve got a bit of experience. If nothing else, you won’t waste any of your precious bud in a failed attempt to try something new.







You must be logged in to post a comment.