We are honored you’ve chosen The Weed Blog to learn how to grow cannabis indoors. Before you get your hands in the dirt, it’s important to understand the legality of cannabis cultivation in your area to prevent any unpleasant interactions with law enforcement or significant legal consequences. Research your state and local marijuana laws to ensure you’re cultivating legally. Despite any local allowances to grow cannabis, the practice is still prohibited federally.
When growing indoors, you have full control of the environment, and you can save money while producing high-quality cannabis! Plus, there’s a unique satisfaction in growing your own. Many cannabis enthusiasts claim they didn’t fully appreciate the plant until they grew it themselves.
The biggest benefit of growing weed indoors is that it allows you greater control than growing outdoors. Growing indoors provides opportunities to implement strategies like introducing high levels of CO2 which will result in bigger buds with higher THC concentrations.
While the benefits of growing indoors are many, there are still potential problems that could be costly or disastrous to your crop if you’re not paying careful attention. Before making a significant financial investment, you want to be confident in your ability to produce a successful cannabis harvest. Your time and effort will be substantial as well; nobody wants to spend weeks in a garden only to produce fodder for the compost pile.
Setting Up Your Garden
Before planting seeds, it’s imperative you have the right materials for a proper indoor cannabis grow. We’ve compiled a list of general materials needed to produce a fruitful harvest:
- You need to identify an area to grow. This can be a closet, indoor grow tent, spare room, or basement.
- Purchase indoor grow lights. These come in different varieties, but we recommend HPS (high pressure sodium) lights for beginners.
- Determine your grow medium. This could be soil, Coco Choir, or a hydroponic system.
- Purchase proper nutrients.
- Locate and purchase seeds that interest you.
Choosing Your Seeds
Selecting the right seeds is critical when determining the type of cannabis plants you want to grow. The color, height, quality, and aroma of the plant all depend on the quality of the seed. Try avoiding seeds that are damaged, soft, pale, or green. These seeds are not mature enough to begin the process of germination, which could result in weak plants, or worse, no plant at all.
Good seeds will be dark brown, shaped like a teardrop, and encased in a hard shell. Darker tiger stripes generally indicate indica seeds, while brown mottling seeds are typically sativa.
The most important factor when selecting seeds is choosing regular or feminized. Feminized seeds are typically more expensive, but most growers agree it is well worth the cost. Feminized seeds ensure the plant is going to be a female 99% of the time. This is important because female plants generally produce larger buds, and if a male plant is present, it will stunt the growth of the female plants.
Regular seeds have the capability of producing both male and female plants, but using regular seeds is risky because they could dramatically reduce the size of your harvest if they produce male plants. Therefore, beginners should strongly consider using feminized seeds.
How do You Germinate Your Seeds?
The easiest way to germinate your seeds is to plant them directly into a grow medium. Another common way to germinate seeds is using a seedling plug. Plant the whole plug after germination, and you’ll be on a proper growth trajectory. You should always use seedling plugs if you’re growing hydroponically.
When choosing the number of seeds, keep in mind that not every seed will flourish. It is common practice to assume 10 – 20% of the seeds won’t make it, so make sure to overestimate. The time it takes for seeds to germinate depends on many factors, but usually seeds will germinate in 2 to 7 days.
For beginning growers, it might be beneficial to practice the germination process on inexpensive seeds as you don’t want to take the risk of ruining a costly batch while you’re still learning to grow properly.
The Soaking Method
One of the most effective ways to germinate cannabis seeds is using the soaking method, which is a reliable process and easy to execute. Fill a cup with warm water and drop in the seeds, then look for the seeds that float. Remove any floaters, and cover the cup with a lid. You will see the roots start to sprout in 24-48 hours. Once the roots have grown about a quarter inch, transfer them to your grow medium. You need to be very careful during this process, as the small sprouts are delicate.
Germination Tips
The germination process is expedited when seeds are kept warm. Once seeds are ready for the grow medium, place the seeds about two inches deep in the medium. It is crucial to keep the seeds moist but not soaking. If the seeds dry out, the process stops there.
Older seeds germinate slower and often have lower germination rates than newer seeds. However, even with fresh seeds, some strains germinate better than others. Don’t be too concerned if it’s taking awhile for your seeds to germinate. Patience is a virtue right?
How to Water Seedlings
Novice cannabis cultivators often accidentally overwater their seedlings, causing a number of problems such as sluggish growth, droopiness in the plant, or nutrient deficiencies. Properly watering your seedlings is important for the growth of your plants so they can be strong enough to support large flowering buds.
The first time you water your seedlings, make sure to give them 2 cups (500 milliliters) of water per seedling. Pour the water in a small circle around the base of the seedling to ensure you’re watering it instead of the dirt. Wait until the top part of the soil is mostly dry before watering again.
When your seedling starts to grow, slowly increase the water amount so the circle around the base is about the same width as the leaves. However keep in mind, different grow mediums will require different amounts of water. On average, seedlings need to be watered every 2-3 days until they are no longer seedlings. When your seedling is a few weeks old, it should have a healthy root system that can handle more water.
Switch to a normal watering practice once you transplant. This generally means to water your plant until there’s a slight runoff near the bottom, but don’t let your plant remain in the runoff water. Wait until the top inch of soil feels dry to the touch before you water again.
If you decide to grow in Coco Coir or hydroponics, it is very important to add nutrients to the water because Coco Coir and other hydroponic grow media don’t have enough phosphorus, nitrogen, or potassium to sustain plant life. Potting soil, however, only requires minimal extra nutrients.
The Transplant
When your seedlings are ready, you’ll need to transfer them into your garden. Remove the seedlings from their small containers and place them into large containers so they can continue to grow properly.
It is very important to complete this process with as minimal light as possible so the plants will have time to settle into their new homes before the next cycle of photosynthesis begins. Transplanting can cause some damage to the root system which can cause stress to the plant. Allowing proper settling time will alleviate this stress as well.
The Vegetative Stage
During this stage of growth your plants will start to produce new stems and leaves without buds. Caring for your cannabis plants during this stage is rather simple, especially if you have any gardening experience. Water the plants regularly, or maintain the water reservoir if you’re using hydroponics. To prevent excessive heat from killing your plants, periodically adjust the grow lights as the plants get taller.
Look for discolored leaves or droopiness. Removing discolored leaves from your cannabis plant will help to grow bigger buds because the plant can focus its energy on growing buds instead of trying to revive the leaves.
It’s very easy for cannabis plants to recover during the vegetative stage. Do your best to make sure your plants have adequate water, nutrients, and light. If you happen to make a few small errors, your plants will likely return to health after corrections.
The Flowering Stage
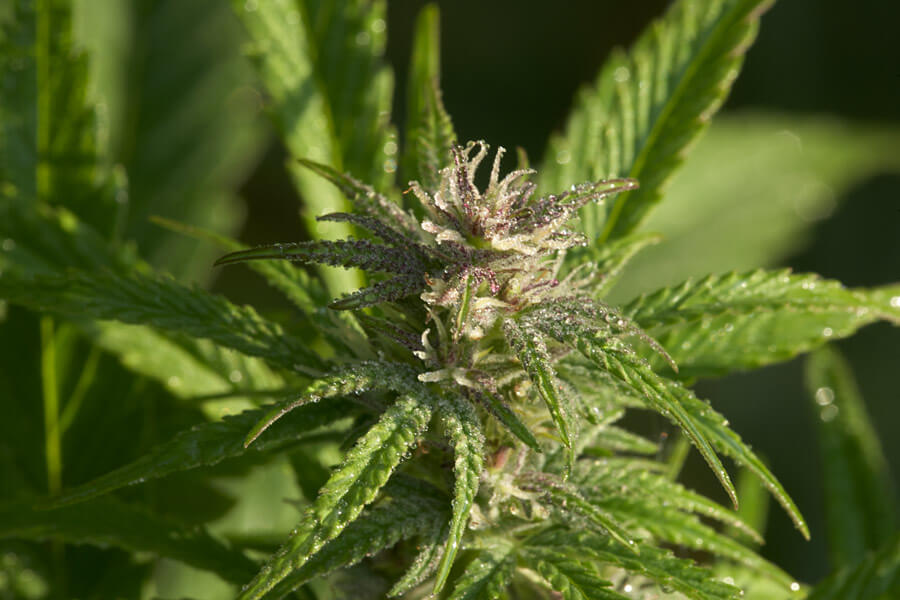
After your plants have reached half the final desired size, they should start flowering. This is the most coveted growth stage among cannabis enthusiasts because the flower produced during this stage will be processed to become smokable buds.
Initiate the flowering stage by setting your grow lights on a timer with a 12/12 light schedule. This means the lights will be off for 12 hours and on for 12 hours. Make sure the plants are in absolute darkness during the dark period or the buds will not grow properly. Ensuring the grow space is totally without light is the key to this process.
After the first few weeks with the 12/12 light schedule, your plant will be growing quickly. This especially fast growth period is known as the “flowering stretch.” Many cannabis cultivators get extra growth out of their buds during this period by providing their plants with CO2 and switching from regular nutrients to bloom nutrients.
Your cannabis plants will typically start growing buds within 2-3 weeks after the switch to a 12/12 light schedule. When your plants start flowering, double check to make sure all of them are female. Male plants will produce pollen sacs at stem junctions which are easily identifiable. If you find any male plants, remove them immediately and discard them in plastic bags to prevent pollen spread. The presence of male plants will significantly reduce your flower yield.
Watering
The amount of watering needed for your indoor cannabis plants completely depends on the size of your plants’ containers and the intensity of the light your plants are receiving. A good rule of thumb is to water your plants every other day. Watering every day may prevent roots from receiving proper air flow.
What Soil Should I Use?
Make sure the soil you select for your cannabis plants is highly drainable, but still has the ability to retain water. You’ll also want to consider the pH level, nutrients, and texture. Coco Coir is currently a popular choice and is sold in large bags or bricks. Many cannabis growers like to mix Coco Coir and regular potting soil to create a super soil of sorts.
It is very helpful to purchase a pH testing kit to ensure your plants are growing properly by making accurate pH assessments. It is also important to be cognizant of the nutrients you put into the soil as they relate to the pH balance as well.
Nutrients
The primary nutrients required for a high quality cannabis crop are nitrogen (N), potassium (K), and phosphorus (P); however, these aren’t the only nutrients found in cannabis fertilizer. There are micronutrients such as calcium, magnesium, sulfur, and several others. While these micronutrients aid specific growth processes, they are not as crucial as the three core nutrients.
Nitrogen
Nitrogen helps stems and leaves grow. Without nitrogen, the leaves of your cannabis plant will turn yellow, and the plant will eventually die. Use as much nitrogen as possible, especially during the vegetative stage.
Potassium
Potassium is needed to build sugars and transfer them throughout the cannabis plant. Potassium also creates rapid growth with its ability to help the plant absorb water and other nutrients.
Phosphorous
Phosphorus is a key nutrient for indoor cannabis plants during the flowering stage. During this stage, you should provide the plants with more phosphorus than nitrogen because it will allow the plants to produce bigger buds.
When first transplanting your seedlings into soil, use only half of the recommended amount of fertilizer since most nutrient recommendations are too strong for seedling plants. However, you will need to increase the fertilizer amount if you notice plants are looking pale or lime green, as this likely means the plants need higher levels of nutrients.
What Now?
Hopefully you have a successful indoor cannabis harvest. Now all you have to do is trim the bud and dry it, then it’s yours for consumption! Growing weed indoors is nothing complicated, and if you need to refer back to this guide, it will always be here. If you have any tips for growing weed indoors, leave comments below and let us know how you grow!













You must be logged in to post a comment.